Hi there!
Thanks for popping in.
Pouring down here now. Was beautiful weather an hour ago!
That’s English weather for you, eh?
If you don’t like it, wait a minute!
Last week, just before the retreat, who knew it would melt away overnight? It went from minus 11 to plus 11 within 24 hours!
And the water pipes all burst down south, but who cares?!?!?
Not I!
I was just so grateful that the retreat guests could mostly make it, the absence of water in the house was neither here nor there!
We had a lick and a promise for a few days – as Linda Williams so succinctly put it!
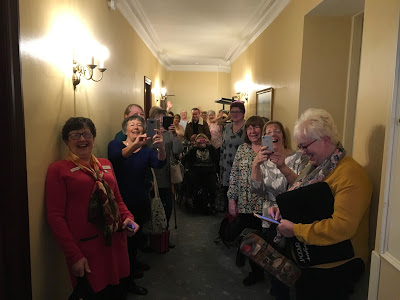
And there they were, half an hour before opening,
patiently waiting!
I opened the door to see if it opened – and BOO!!!

And then the games began.
Two days packed with teaching and techniques.
Here’s a technique we tried up the shallow end…
 |
| #wellchuffed |
First emboss a large flower from the 1-2-3- plates.
Sweet pea looked like an easy one to me.
No. 1 tool.

We want to cut out the inner of the flower, so we need a 2-needle fine or bold, depending on your level of proficiency. If you are starting out, then the bold tool is maybe best – only because the holes are larger and you can see them more easily!

Work your way around the inner lines of the petals. Turn the parchment as you go. Make the artwork come to you.

Here we see my group deep in concentration.
Team Orangery we called them!
Because that was the name of the lovely room!

All done. All done from the front.

Now for the cutting. Always keep the scissors over the bit which is going to fall out.

Turn the artwork. Make it come to your hand.
Missed a bit. never too late to add a couple of holes carefully!

Next, we learned how to use a pattern.
Lay it underneath the circle we are working on.
Lay the pattern on the white super foam mat.
Now, using the Semi-Circle, let’s go round the circle, literally piercing the parchment and the paper.
But only lightly. It’s called SHALLOW PERFORATING
Work from the front.
You can go round without a pattern too. This just ensures the same distance between the little semi circles.
Now with hindsight, I KNOW I should have done ALL the perforating prior to cutting.
But there you go. Now I just have to be more careful round the side where the line has been cut.
It’s not terminal; it just means I have to be more careful, so as not to split the parchment.
 |
| Shallow perforating |
Next, flip the parchment to the back, and lay it on a soft pink embossing mat, or the soft side of the black Groovi mat.
Using the No. 4 tool, and working from the back, gently white emboss the inside of each of the arches. Actually, it will be more grey than white the first time round.
Then go round again, always from the back, this time using a smaller tool.
If you can, let it rest a couple of hours, and then go round one more time, using an even smaller tool.
Once you‘re happy with the whiteness of your scallops, it’s time to reperforate the holes.
Use a 1-needle fine tool for this job.
I laid the black foam on the white super foam, so that I could see where I was going. Then just push the single needle down all the way through each hole.
See the difference?
All the way round….
…and then cut
When you get it, and you start to get into the rhythm,
there’s nothing quite like it for relaxing.
There you go!
Happy with that.
Attached the piece to a piece of designer paper, so that the colour peeps through the cut out areas.
I used Perga Glue to attach the piece.
Dabbed it on the back with a sponge.
Got away with it because it gave me a super mottled effect.
But next time, I think it will be brads for me!!!
Trim and edge the designer paper with a Sharpie pen.
The mottled look works here, because of the marbling in the designer paper. But I wouldn’t recommend you try this after all this work, unless you enjoy panicking! PIS with Brads!!!
Play It Safe…
 |
| Happy with that. |
Here was a very proud moment, when I came into the dining room in the evening for dinner. 90 Clarity guests atwittering and chattering and relaxing. It was magical.
But now it’s time to catch the end of the rugby with all the Grays.
Italy-Wales.
I think Wales have it!!
Love & Hugs,
Barb
xxxx
Like this:
Like Loading...


30 thoughts on “Sunday Groovi step by step. It’s an inside job!”
Hi Barb,
That's a lovely little piece of artwork, really like the backing paper you've chose as well. Funnily I've been using a semi circle today too at Linda's workshop at CC Aycliffe. First time I've used one and could I heck as like get it to shallow pierce! Then got a good tip to use funky foam instead of the whitemat as it's firmer. Will have to remember that one! Your guests certainly look as though they are concentrating and the venue looks fabulous. Thank you for sharing this. Off to make a coffee and get the roasties in the oven. Love and hugs,Alison xxx
Hi bloggy friends ( note I got the spelling right today!),
Had a great day at Linda's Groovi workshop today , the group is really starting to gel nicely now. Even managed to pick up a Gemini Junior with 20 % off + double CC points so good day. Thank you Linda for all your work. Really must go and get roasties in oven or we won't be having dinner!! Love and hugs to all, Alison cxx
Hi Alison – I couldn't resist teasing you about the spelling! Sounds as though you had a really good time today, got a bargain too! Love and hugs, Gilly xxx
Hi Alison, oh I loved that store when we visited it on holiday, such a brilliant space for workshops, I just wish they would open one down south. You got a bargain didn't you and it sounds like you had a fab time too. Xxx
Lovely pics of everyone busy grooving ! It’s mind blowing when you think of all the designs you could create with just a few plates and cutting out different areas. Good to see the close ups too. I must admit that shallow piercing isn’t my favorite past time as I know I’ve got to do it all again after! However, I do not it’s a necessity ! X
Hello Barbara
Lovely pics of a fabulous few days.
Love
Roz.xxx
Front of the queue to get started Ros and Karen. I knew you were keen. Such a fabulous time though. xx
It was a fabulous achievement Barbara, it all seemed so well organised but can only imagine the amount of work that went on behind the scenes. Thank goodness the snow melted when it did, think you had more faith than me at one time. xx
Lovely to see photos of the retreat and a good time was had by all. Lovely parchie art too and it looks stunning on the blue background. x
Very glad all went well. Good tips must get more practice in x
There Dave watching over I’m sure he must be quiet the expert by know about all crafts, wow you could see that white pop as you did the stages of work looks great looks like all had so much fun and learnt so much so looking forward to July and Katie she is getting mega excited and more so when told her about 4 weeks andwill see you at ally pally she nearly burst with excitement lots love joy and Katie xx
thanks for sharing both the photos & a project from the Retreat. Sounds as if you all had a brilliant time. How different the weather is this weekend from last, almost tropical !!
Hi Barb – thank you for both the photo at the retreat and also the step by step – something for me to aspire to! It sounds as though everyone had such a great time – love and hugs, Gilly xxx
Hi bloggy friends – it's been a truly horrid day here. Rain, rain and more rain! I hope that everyone has had a good day, love and hugs, Gilly xxx
Hi Gilly,
Sorry your weather has been so horrible today. Yes, I had a really good time at the workshop and of course a bit of retail therapy does you good, haha! Love and hugs, Alison xxx
Looks like everyone had fun. Great techniques. Just wondered where your patterns came from. Love the circle one.
Hi Barbara
It looks like you all had a good time and what a super venue. Thank you for the close up step by steps, it makes me think I could achieve it, I just need to spend that hour a day having some concentrated groovi time. The backing paper looks good behind it and thank you for the glue tip! Hope you've had a good time with the family, we've missed the rugby today.
Love Diane xxx
Hello bloggy friends, happy Mother's Day. We've been entertaining mother in law, they were glad to escape from the pandemonium of Salisbury for a while. It's been a wet and horrible day here so chatting and laughter instead of a walk. Take care xxx
Hi Diane,
Gosh, I bet they were pleased to get away from Salisbury! Sounds like it's horrendous! It's a lovely city as well. Sending love and hugs, Alison xxx
Evening, loving the flower plates they look so pretty with the design you have done. Haven't seen much of the rugby as I've been in the craft room or out with Mum. Hope you had a lovely mothers day. Xx
Evening bloggy friends, hope everyone had a good weekend and a lovely day being spoiled today. Sending love to all. Xx
Hi Donna,
Yes, lovely day thank you. Mind you I was a bit upset that Scamp forgot to send a card to her Mam!! I forgave her thought as she's getting old and doesn't like being out and about!! Since I got back from the workshop she's hardly left my side, lots of cuddles were needed. I always smile at that because when I got her from the RSPCA they said " oh, she'll never be a cuddly cat!" How wrong were they!! Hope your crafting went well. Sending love and hugs to you and Phoebe, Alison xxxx
Hope everyone had a happy day. That step by step is lovely, my instinct would have been to cut around the flower but that works so well it has given me some great ideas. Of course it’s the designer paper that makes it work so well xx
Great for the reinforcement Barbara. I didn't know you were taking the pictures. They certainly are a helpful reminder of what we did but also what great company and teaching we had. Roll on the next one. Sleep well xx
I'm glad everything went so well. I'll have to try that project as I couldn't resist getting Linda's latest plates. Thanks for sharing.
Hello Barb, another great step by step. The photos from the retreat are fab, you can almost feel the concentration. Take care all. Bx
Thanks for the great step by step Barbara. I shall definitely be trying this one. I am looking forward to seeing all the Clarity team at the NEC on Saturday. Hopefully this time I will manage to get a place on the make and take. Have a good week. Annette X
Great step by step, will be following the instructions very closely
Wow! Shallow end?? Lovely piece of work Barbara xx
Great pic, all those smiling faces at the Retreat! Nice step by step too to help 'get a handle' on the snipping etc but I can only imagine how careful you had to be doing the scallops after cutting all the flower so beautifully, as you say "lesson learned" and all turned out well in the end.
Great day today at Linda Page's workshop, great project and with a great group of people… finished off at home so will post a pic on Groovi FB page. Looking forward to the weekend shows. xx