Old Trick with a new Twist…Step by Step.
Hi there.
Thanks for popping in.
While you’re here, would you be so kind as to tell the driver to slow down? We are hurtling towards Christmas and we haven’t even got a tree up, or cards written. What am I saying? Written?
I haven’t made them yet!
Ah well. It will all get done, but I do wish there were about 48 hours in each day just now. I said to Dave this afternoon,
“What I need is for everything to stand still for about a fortnight,
so that I can catch up.”
So instead of all that stuff on my list, I decided to retreat up to my little haven above the garage and try something out.
When our Maria was on TV yesterday showcasing those superb Rennie Mackintosh inspired stamps, there was a particuler sample from Jane Telford which caught my eye, with gilding flakes.
Very lovely.
The roses were red, and Jane told me she had picked out the red flakes in her stash and placed them behind the rose.
So a thought occurred to me, since I’ve onlt got gold and silver flakes left. What would happen if I coloured in the design from behind with Promarkers?
Would the flakes still show through?
Answer: OH YES!!!
Really easy and really lovely effect.
Ready?
Cut A6 double-sided adhesive in half.
Peel off the backing on one side.
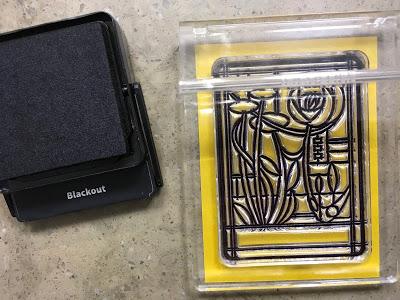
Stamp the stamp onto a half-piece using the Radiance Blackout.
Ideal for this.
Peel stamp off sticky. Perfect image.
Add word stamp. I blotted it lightly first, to prevent sliding around.
Lay the adhesive sheet inky side down on a piece of acetate.
Roll over with a brayer to squeeze out any air bubbles.
Trim with a blade and a Pergamano Ruler with the Groovi Grip on.
NO SLIDEY!
Peel off the other wax backing paper.
Colour in the image with Promarkers, or other Alcohol pens.
I wondered whether adding the ink would mean the adhesive would lose its stick. Nope.
Next add the gilding flakes.
I had Gold and Silvery Moon.
Rub it with a finger or a little sponge.
Mmmm. How to attach the piece to the black card.
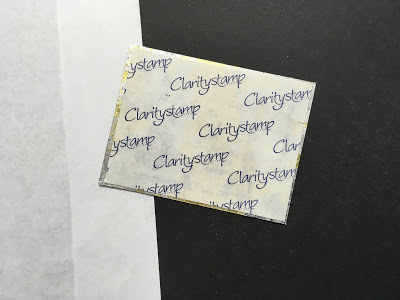
Add the other half of the original A6 adhesive sheet (trimmed to smaller than) on the back.
Back on black, then on a white card.
Done
When you look closely, it is very antique looking, quite vintage, stained. The photos don’t do it justice.
Here are the stamps:
I am in love with these Rennie Mackintoshesque designs which Jim created. In fact, I’ve drawn another 4 myself, for a January launch!
Right.
Break over.
Time to stop procrastinating !!
Love & Hugs,
Barb
xxx


25 thoughts on “Old Trick with a new Twist…Step by Step.”
Hello Barbara
I love anything CRM inspired. There is a house in Northampton which had its' interior designed by the great man himself. Worth a visit!
Love
Roz.x
Love this technique , haven't thought about it for quite a while ,you have given me inspiration for my daughter in law birthday card …thank you … I to need the word to stop for a few weeks .I'm sure everything will be done and ok in time for the day .if it isn't we'll cold and still have a great time with family ..
that is a clever idea. will need to try it, hugs xx
Beautiful Barbara, really does look just like a stained glass window with the light coming through. Yes I would like Christmas to wait for a week or so, just have to think 'what gets done, gets done, what doesn't doesn't', I'll have to practise what I preach, won't I? Ha ha. xxx
How wonderful something to look forward to after Christmas . I’m in process of decorating candles to give to my brother niece’s and nephews etc as small gift stamp on the tissue paper in process of colouring then the scary part adding to candles haven’t done any for while. Love hugs Joy xx
I love your new twist to this technique Barbara! And glad I made you think to do it!
Love and hugs! Xxx
Beautiful designs and a beautiful card. Have been busy in my carft room preparing cards and tags etc for Christmas. Straight in there after work, music on, singing away! I have a plan and a schedule which (at the moment) seems to be working. XX
Evening bloggy friends, busy busy, busy at the moment! Had Christmas jumper day today at work and it was Christmas dinner too! Very excited children, so I certainly needed a bit of calming craft today. XX
Hi Donna I remember it well. Always enjoyed it all the more post concerts when they had all gone well xx
What a very lovely effect. So excited there are more Rennie MacIntosh designs to come too. Hope you find some more hours in the day tomorrow x
Beautiful. I have gilding flakes but never used them so I must give this a go after Christmas xx
I need these stamps, love the designs. I remember my daughter watching you do a similar technique at the NEC a few years ago, she was absolutely blown away by it. She is not a stamper but could not believe the effect you had created. As for cards perhaps be kind to yourself just buy some, you do have a lot of balls in the air juggling. xx
Beautiful card, will try this sometime. Love the stamps, but trying to be good after your brilliant sale. Looking forward to seeing your new designs in January. More temptation. xx
Hi Barb,
Love Ronnie McIntosh and have these in Groovi but not stamps. I love what you have done here- it really does look like a stained glass window. Last time I used the gilding flakes I dropped the pot over the cat. Poor little thing was very colourful!! So she been glittered and gilded – no wonder she's not too keen on being in my craft room with me!! Love and hugs,Alisonxx
Hi bloggy friends,
Hope everyone is ok. Just got in from a lovely meal but am absolutely shattered so will say night night to you all, Love and hugs Alison xxx
Great use of alcohol pens and gilding flakes, love the finished result. Got the Groovi plates and looking forward to your new ones, hopefully Santa will bring some cash as a present – lol! Cards all done, written/posted and hand delivered; food all sorted just veggies to get nearer the time…not got a single present yet tho…oops! Xxx
Hi Barbara
I’m with you to slow the world down, time is running our rapidly isn’t it. Love the effect of the pro markers on the sticky sheets, amazing effect isn’t it.
Love Diane Green xxx
These deigns are beautiful Barbara and the gilding flakes give a wonderful effect. I must watch Maria on catch up as I missed it. I know what you mean about stopping time to be able to catch up on everything. I am still making cards so I take my hat off to those that have already done and posted and are now completely ready for Christmas, I am just not organised enough to be like that..lol. x
At this stage of the game, I wouldn't consider trying to get cards made. I'd just buy them and save myself any stress xx
So many Mackintosh influences still evident the length and breadth of Glasgow, not forgetting the pieces on show at the Kelvingrove Museum. ;~}
Beautiful stamps and a great technique Barbara. Look forward to seeing the new ones in January. Hugs xx
Hello Barb, I am with you on slowing the world down, or give us a week back (without the snow of course), then I may have a chance! Love what you have created, the stamps are really beautiful, will look to get them in the new year, as I am sworn off spending for a while. Take care all. Bx
Great idea love this idea
Wow how lovely, I absolutely love my Groovi plates in the same design x
Lovely card. Looks so much like stained glass.