China Blue Duck.
Large Sapling Tree
Small Sapling Tree
Both Trees Very Special Offer
Denim Adirondack
Denim Blue Promarker
Black Micron Pen.
Ready? Steady? Go!
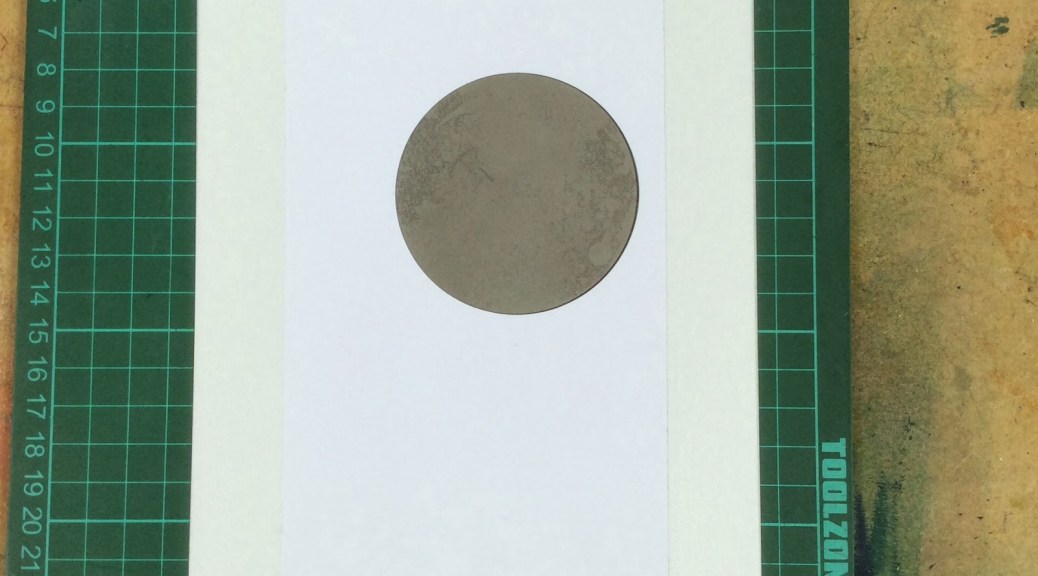
Run Low-tack masking tape around all 4 sides of the
A5 Claritycard – that’s the shiny stuff.
Add a huge moon mask.

Before we get ink all over the Claritymat,
let’s tear a hill with a sheet of copy paper.
Easy peasy, lemon squeezy!

Now ink up the brayer in the Juniper,

and transfer the ink to the mat, by rolling up and down.

Brayer an undercoat of Juniper in the sky.
This makes for a wonderful blue; wait and see.

Now load the brayer with the dark blue Denim, and transfer the ink onto the mat again, right next to the Juniper.
Notice how I avoid getting ink on the edge of the rubber roller – this will help get that lovely air-brushed effect,
with less of the stripes!

Lay down the sky at an angle and straight over the Juniper.
Take a look at the scrap white paper underneath the artwork;
this will tell you the angle and where to begin rolling.

Let’s flick it round, so you can see what it’s supposed to look like, without developing a crook neck!

Remove the huge Moon mask carefully,
so that you can use it again, and again, and again…

Now for the Hills. Reload the brayer in Juniper.
Yes, I know. I should have cleaned my brayer first.
I should have gone to bed at ten last night, too, but I didn’t.

Now time to blend the 2 ink colours.
Roll the Juniper up the side of the Denim, so that they overlap.
Your brayer will be coated with the blend now.

Position the front hill where you want it,
and start rolling back and forth.
With the brayer, I mean!

Go back to the mat for more blue-juniper mix.

Move the hill mask, to add a lighter hill in the background.

Move the hill mask one more time
and add a third, faded hill in the far distance.

Dark, lighter, lightest = front, middle, back.

So now we are really getting to grips with the blending mat!
Buff your work with a paper towel.

Let’s use the ink on the ClarityMat for stamping, too.
Ink up the large Sapling tree.

and plant at the front.

Ink up the smaller tree,

and plant in the background. Place the hill mask over the front hill, so that the tree sits behind the hill.

Add the duck in flight. Again, take the ink from the mat.
Blast!!!! The back tree is a bit dodgy.
Don’t you hate it when that happens?!
Never mind….keep going!
Pretend the sun is shining on it…

Try and tart it up with a Promarker…

Maybe toning the whole card down by brayering a coat of light Juniper over the whole card will take the attention off the
botched tree….

And every single one of you is looking at the dodgy tree now!!!
Forget the tree!
Pretend I never mentioned it!
Admire the wonderful airbrushed border!

It’s no good.
My “that’ll do” mantra isn’t working.
It would have been great;
now it’s just grate.
This requires a radical overhaul.
Are you ready for this one?
Time for some pen work….

Start with the leaves on the offensive tree….

You can’t do one without the other!

Oh well, in for a penny, in for a pound.
Hills next.

Might as well add a few furrows.
Get a bit of depth going…
And let’s jazz up the duck, too.


Close up, you can see the dot dot dots…

How about a dot-dash line around the top?
Fade it out though.

Now that’s better. Much better.
Yes, I will put my name to that one!

Too much of a border. Trim it back.
Just need to find some dark blue to mount it on.

Much happier with this now, don’t you agree?
And the best thing is that, we have developed a new technique!
We’ve used silhouette stamps to colour in images,
and then we have added the lineart! That’s a first.
I could have sworn that we usually draw the picture and THEN colour it in!
Hope you like it
x
Much love,

71 thoughts on “China Blue Duck.”
Oh wow Barbara, I love it. The pen work on the trees and duck is fabulous and I really like the shaded frame. Another winner and some new inspiration to try out. Thank you xx Claire
That is just perfect and has given me ideas for a piece of DT work I need (with full credit to you, of course, Barbara). I hope you will have plenty of these new mats at the NEC in March. Congratulations to Julie for her fabulous win today. Stay safe everyone. xx Maggie
Congratulations Julie, enjoy your mat. Great card, love the outlining with the pen, another fab idea. Thanks Jx
Love it. Isn't it wonderful how we can find ways to cover up areas we're not happy with (even if others would never have noticed)
So glad the storm woke me up, so I checked the ole iPad (as one does, well I does!) what a wonderful blog Barbara, can't wait to give this a go. I have the stamps and the inks and now I have a great set of instructions. You are one amazing lady. X
I was going to tell you off – could not and still can't see what was wrong with the back tree and I love the effect you achieved. Then I moved down the page a little at a time and wowser! Absolutely G.R.E.A.T. Fabulous, thank you for sharing xx
This is brilliant Barbara. It's so striking. Talk about taking the drama out of a crisis, it's almost like you planned it! And definitely a strategy to try rather than binning it which is what I usually do x
Magic …where about in your mind did that spring from? Oh but what a fab card you have created .love it x
F A B U L O U S Barb…..after I finished rolling around with my tea whilst reading this only to realise you meant the brayer……I truly had not noticed anything amiss with the second tree until you kept on about it…but what a great way of turning it around instead of flipping over the paper or worse putting it in the bin…will remember that tip the next time one of mine does not stamp quite so good! Mind you I tend to have a problem of smudging! – any tips on that one ??? You were right about the juniper and denim mix too – lovely sky and hills xx Oh well must away – have to drag myself to work via the post office where I have a parcel to collect which I hope is a clarity parcel I am waiting on…til tomorrow xxx
Hello Barb, what a lovely card, and great idea, although I had to look really hard to see what you were trying to fix. Congratulations Julie on winning the mat. Another great blog post. Bx
Love this card, it reminds me of a cold frosty morning! I loved your technique with the pen it really brought the picture to life. so all in all I would call the tree in the back one of your happy accidents as you were able to show us another technique for the times when something isn't quite right.
It's amazing how two completely different looks can be achieved just by adding the pen lines and some colour. I like both effects equally. Might try it with other stamps too.
Fantastic! Your creativity is limitless and very inspiring!! Your humour is pretty funny, too!!! Helen xxx
Loving the pen work – it looks wonderful! Lucky you botched the tree eh? Or were you going to do that anyway?
Hi Barb,
For the life of me I couldn't see anything wrong with the tree but then as I scrolled down and saw the finished card – wow what a difference ! The finished result is fabulous. Really love everything about it. Think I will be ordering again! You are very clever you know. Love Alison xxx
Ps Congratulations Julie – enjoy playing with your new mat.
Just love this technique and the finished card. However I did also like it with the bodged tree (that I couldn't see!). Thanks for sharing x
Lovely. Just lovely!
Wow that is amazing, anyone would think you botched that tree deliberately to get that effect! xx
You've blown me away with this one !
Typically clarity and gorgeous. Didn't notice the botched tree, welcome to my world!
Marilyn x
This is amazing, what a difference between the two images. What a great technique, must try this next time I'm not happy with a stamped image. Well done to Julie – enjoy your mat. Thanks for yet more inspiration Barbara. xx
Really! What a perfectionist you are!! The original was great but your final piece amazing. You are so inspiring. Just wish I was half as good. Joan x
Your brain must hurt from all this buzzing! Love it yet again…thank you
You are a very talented lady Barb. Have learnt a lot from you over time by the detail and perspective you use. Love the way you brought a dreamy piece of artwork alive by using other techniques. The first piece of artwork was lovely but wow how it can be changed.
You are definitively a perfectionnist. Lovely card and I really love what you've done with the first hill, looks like a field ready to be seeded. Great tutorial and inspiration, thanks.
Laurence xx
Brilliant once again. And it made me smile!
Loved it before and loved it afterwards!
A beautiful scene to send to someone.
Thank you Barbara for all your tutorials -they really help.
XxxxRuth
First of all, Well Done Julie…enjoy your mat…..another inspirational piece of art Barbara, and such a striking design….another technique to play with….oh Happy Days…..Jo. X X
Fantastic – I love it when you help us to correct those mistakes that I always seem to make!!! Great final image – must remember to experiment a bit more with edging borders. Thanks, Susan x
What great step by step instructions……..
Thank you!
Well what can i say i love this new world i have just joined in to the card looks amazing i must have ago.
Oh my, just beautiful x
Hi Barbara. You have done it again! I feel that I can have a go at this and end up with a piece that I will be happy with: ) Brilliant how you covered up the tree you weren't happy with. Love it. Congratulations to Julie Mac, enjoy your Clarity mat 🙂 Take care.
Gorgeous card Barbara. Great.
Hugs
CraftyJacq
Xx
Thats so lovely ,i love using brayer great card xxx
Morning Barbara,
Couldn't really see your botched tree but loved the finished card, I will definitely try the lineart!!
Lorna D
Congrats to Julie on winning the mat. I hadn't noticed the botched tree until you mentioned it Barbara but you've certainly changed botched to beautiful! Fabulous lineart, I wonder if mine will look anything like that? Pat x
Glad that you re-visited the brayer technique because I inadvertently 'brayered' Clarity shiny card earlier this week using the Gelli method and forgot to 'flick'. Didn't look that good at all. Too much Gelli again. I loved you botch job before and after it was finished. Thank you..
Love your card Barbara and the way you rescued it not that I'd notice the botched tree until you mentioned it.
Congratulations to yesterday's lucky winner
Jackie x
Great flying duck card Barbara. Congrats to the winner of the mats too.
Lovely before then WOW after the penwork!
You are always and ever inspirational whether you're creating or just talking
Love you to bits!
Barbara you made me smile again with your comments on your blog its as though your in the room talking us through it, fabulous art work wonderful xx
Hi Barbara, Youre so good at explaining each step. So easy to follow and a magnificent out come. Love the pen work.
Love val x
Good afternoon Barbara, thank you, I've learned a lesson today- no longer will I just throw away a project when I think it's gone wrong, oh no, I will be trying the line art rescue remedy first! Amazing, you surely have a steady hand ;-))
Congratulations to Julie Mac for being the lucky winner of the mat
Congratulations Julie, have many happy hours with your new mat.
What a fab card, and it came about due to a boo-boo. Amazing!!
Fantastic Barbara. X
Oh, so funny! You do cheer up my boring tuna sandwich at lunchtime. Juniper is my favourite colour and I don't use it nearly often enough. Another stunning piece of artwork – now to try and replicate with my Clarity stash 🙂
oh this is great. how to avoid loads of artwork ending up in the bin and making something great out of it. super. keep it coming, hugs xx
Oh I think you were just teasing , you intended to do that all along. Really lovely, I like many others could not see anything wrong with your creation. Did not join in rolling back and forth, did that last night at exercise class, suffering today. Congratulations Julie Mac, enjoy your mat. Think I might go see if I can create something like your card. Lynne xx
Congrats Julie enjoy your mat, Barb the demo today is wonderful I just love your blog. My order from you just arrived (tree stencil and teardrop stamps) so I am away to play 🙂
this is brilliant Barbara, loved it before the lineart as well. You are such a perfectionist x
Another lovely card and technique to try. I like the pen work but wonder if mine could ever be as good as yours but I will give it a go. Planning my first go at brayering this weekend! Yikes! Lots of deep breaths and crossed fingers…………… Or will that make holding the brayer difficult? 😉 Xx
Congrats to Julie Mac on your win. Have fun inking and tearing!
Thank you so much! I'm really thrilled – can't wait to start playing with it, I really struggle tearing the paper to get hills that actually look like hills, hopefully my hills will be much improved now. Today's card is just lovely and gives me hope that rather than throwing my mistakes in the bin, I can rescue them 🙂
Brilliant Barb. I'd have thrown it in the bin when it went wrong. Now maybe I will look at my mistakes as an opportunity rather than a cocktail up!!!!
Lesley
This is brilliant Barbara, you make it sound and look so easy but we know its not lol! Mine would never come out looking that good!
Congratulations to Julie.
Love Hugs
Jacquie J xxx
http://jewelscardcraft.blogspot.co.uk/
Brilliant Barbara you make everything look so easy. you would have needed one hell of a big butterfly to cover that tree looks like it was always meant to be like that 10 plus for you.
A beautiful card Barbara, it just goes to show that we never make mistakes just amendments to our original plan! x
Love this – and thank you for showing us your 'failure' – and how to resolve it beautifully! And congrats, Julie. Well jel…..
Amazing card and well done with persevering when I would've thrown it away!
Such a beautiful and striking scene you've created.Fab demo of your new mat.Well done to Julie for winning it.
Very clever, that's what makes you the best, the ability to adapt what your not happy with to make something else
….that's stunning, developing new techniques in the process. Sorry about the break, I thought I had cracked blogging on the iPad but it still does weird things. Wx
Nothing looked dodgy to me but the finished card looks great. I bough this set when it first came out but have never used it and this has inspired me to have a go, just wish I could get the hills right, my hills really do look dodgy!
Love, love this technique! Shame it's late as I want to have a go now but I've got to go to sleep as I have school in the morning. Didn't think your tree looked that dodgy … the whole picture was absolutely beautiful. Thanks for sharing. X
Nearly forgot to come back! I will be honest what you thought was a mistake I think I would have put forward as my best work? But I am glad you thought it went wrong because I love the end result. That type of Clarity Doodling I think I can do! Xx I love how you have finished the hills too. Xx
I love this brayered scene in mostly blue with that little touch of green. It just goes to show how different a scene can look with the addition of some black micro pen lines which look a bit like zentangle. It certainly gives it definition. This is lovely Barbara, and thank you for the demonstration. x
I loved the before to be honest but I also love the after, great tutorial, got to have a go and follow this demo x
I thought I was going to get a duck on a pond so by the time I'd got to the end of the pics I had a surprise! The pens do make a difference don't they!
wonderful and entertaining.
sehr sehr schön, wie immer harmonisch gestaltet, Vielen Dank